
A graphics card GPU functions as one of the essential hardware parts within PCs, although it serves primarily for gaming activities, video editing processes, and creating 3D effects. The procedure to upgrade or replace a GPU requires correct handling steps for successful results. Any improper handling of your GPU threatens to create damage that could result in PC instability up to complete hardware failure. The instructions contained here detail the step-by-step guide for graphics card insertion and removal procedures while identifying typical errors and their consequences against system integrity.
Preparations Before Handling a Graphics Card
Your PC needs protective measures before any work on graphics card installation or removal because electrical discharges and improper handling could cause damage.
Tools and Equipment Needed:
Several tools are necessary for a successful installation or removal of graphics cards; therefore, you must gather them beforehand.
A Phillips-head screwdriver serves to fasten and loosen the GPU attachment points inside the case.
The anti-static wrist strap acts as a defensive tool against electrostatic discharge (ESD) that threatens sensitive components. Its use is recommended to prevent damage.
The addition of compressed air provides optional but useful help to eliminate dust from both the PCIe slot and GPU connectors.
Safety Precautions:
Your PC shutdown performs first before you enter the interior of the case. Continuous operation of the computer during component removal leads to electrical harm.
Pull the power cable out of the wall socket because this eliminates electrical hazard risk.
The first step needs a ten to fifteen second hold of the power button following power cord removal to clear electrical charge buildup.
Static electricity poses dangers to components, which you must ground yourself against by either using an anti-static wrist strap or touching a metal part of the case before handling the GPU. Prior to GPU handling, you should touch the metal case or wear an anti-static wrist strap.
A Safe Approach to Take Out Graphics Cards
You must remove the existing GPU before switching to a new graphics processing unit from your personal computer system. Follow these detailed steps carefully.
Step 1: Open the PC Case
Screwdriver usage removes the side panel screws, which secure your PC case. The majority of computer cases need left-side panel removal to proceed with this operation.
After opening the panel, you should cautiously detach it from the case and place it in a secure location.
Step 2: Identify the Graphics Card
Your task is to locate the GPU while you are inside your PC case. The graphics processing unit (GPU) will find residence within a PCIe (Peripheral Component Interconnect Express) port located on the motherboard together with attached power wires.
You need to identify the correct GPU among multiple cards when your PC has more than one.

Step 3: Disconnect the Power Cables
An altitude of extra power for graphics boards comes through PSU (Power Supply Unit) connectors using 6-pin, 8-pin, and 12-pin PCIe connections.
Press the release clips on power cables leading to the GPU before removing them with gentle force. Avoid applying forceful pulls on the cables, as such a method threatens to destroy the connector points.
You must remove the GPU from the computer case by first unscrewing it.
Check that a GPU attaches to the case via screws at the base of its I/O bracket, which contains display port connections.
A Phillips-head screwdriver can safely remove the screws from their location. Place the screws in a secure location since you will require them during your future GPU installation.
The next step in the process requires unscrewing the PCIe Slot Retention Clip.
You will find a small plastic retention clip near the PCIe slot area on the motherboard that performs the function of GPU locking.
You should keep light pressure on the clip while taking the GPU upwards to extract it from its slot slot. Excessive force should be avoided because it may break the clip or harm the motherboard.
Step 6: Carefully Remove the GPU
Keep your fingers on the GPU metal bracket and edges while you pull up the card to stop any contact with the PCB, thus avoiding static damage.
Take the GPU at a slow pace out of the PCIe slot space with caution to avoid any blocking components or cables.
The procedure to install a new graphics card consists of these steps.
The correct procedure to install an updated GPU starts with completing these instructions.
Step 1:Prepare the PCIe Slot
Before you can use it, you must examine the PCIe slot on the motherboard to see if there is any dust and other pollutants obstructing its performance.
The PCIe retention clip should be opened to facilitate easy card insertion.
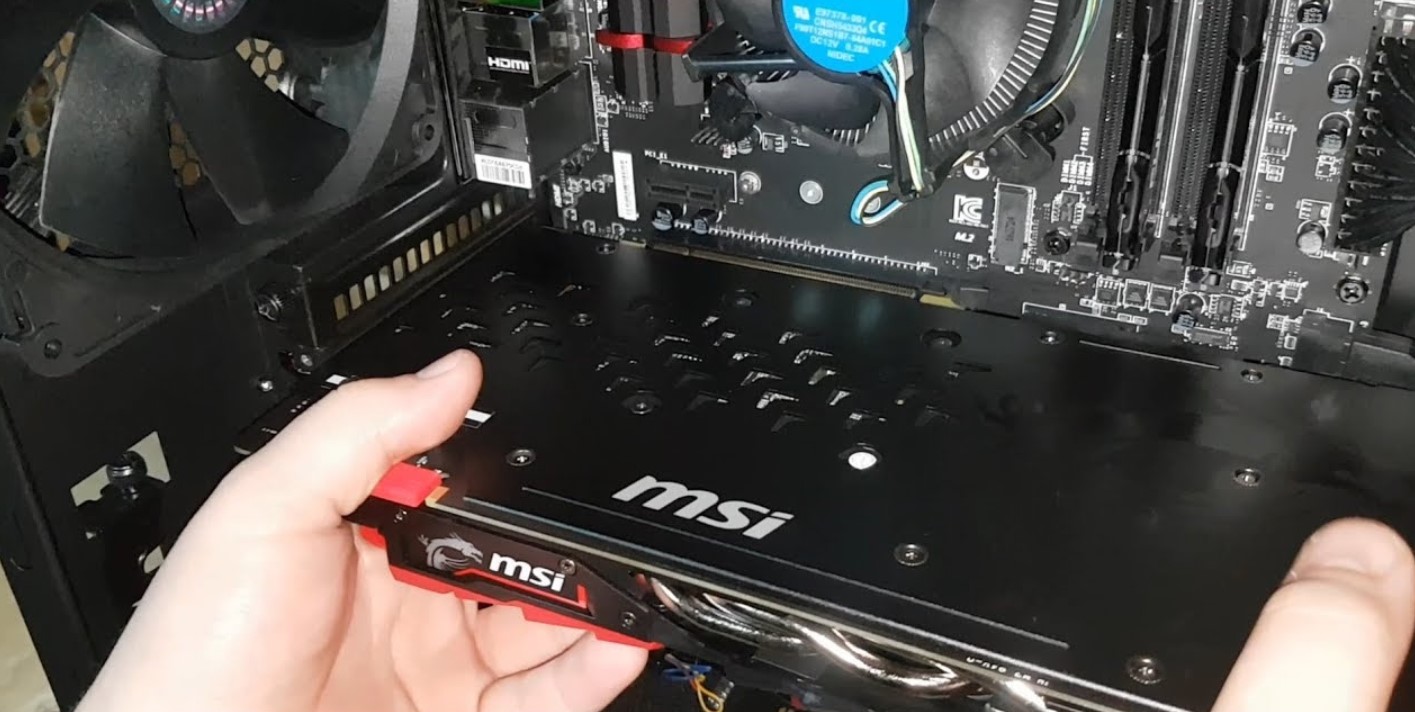
Step 2: Align the Graphics Card
Handle the new GPU using the edges along with the metal bracket without contacting its electronic circuits.
The PCIe slot gold-plated connectors need to match the PCIe slot positions on the motherboard. The connectors need specific orientation since forcing them when not fitting might damage the system.
The final step requires the insertion of the GPU into its PCIe slot.
Gently push the slot entry by applying equal force to both sides of the card.
A successful installation of the GPU into the PCIe retention clip produces a clicking sound that signals proper retention.
Step 4: demands the GPU installation to the case using previously collected screws.
The GPU metal bracket should be attached to the case through use of the screws that you previously removed during installation. The GPU installation will maintain stability through this step since it stops the component from sagging or disconnecting over time.
Step 5: Reconnect Power Cables
Every GPU needs supplemental power from 6-pin, 8-pin, or 12-pin PCIe power cables, which you need to securely connect to get proper function.
The GPU needs secure power connector connections according to the snap mechanism because loose attachments can disable the GPU’s operation.
Proceed to finalize your case through its side panel installation while securing screws and proceed with powering it on.
Attach the side panel of the case after securing its position with screws.
Connect your PC into the power source while turning it on by following the power sequence.
The installation or updating of GPU drivers takes place as Step 7 during the process.
Booting the system lets you access the website of NVIDIA or AMD to download and install the latest GPU drivers.
Drive installation will finish after you reboot your PC.
Common Mistakes to Avoid and Their Impact on the PC
The ongoing static charge can result in component damage to the motherboard because of forgetting to discharge it.
The process of removing the PCIe slot becomes dangerous if you attempt to twist the slot by force without unlocking its clip since this can result in broken PCIe port components that make the slot unable to function.
A GPU seat that is not properly attached will result in display problems alongside system crashes.
A GPU without connected power cables can result in your PC’s boot failure and black screen appearance.
Strong screw torques cause two critical problems: they either deform the GPU brackets or damage screw holes, resulting in improper alignment.
Final Thoughts
The comprehensive instructions provide safe procedures for both mounting new and replacing existing graphics cards on your PC without causing hardware damage. Both component care and proper safety measures should be followed with double connection verification before turning on your system. When properly installed, the GPU increases both your system performance and operational lifespan.
Can I include troubleshooting advice for GPU nonfunctionality issues after setup takes place?
2 thoughts on “How to Insert or Remove a Graphics Card (GPU) Safely from a PC: A Step-by-Step Guide”